Showing posts with label Chock-A-Block quilt blocks. Show all posts

Wednesday, February 26, 2014

Mercer County Star


We are quilting along with Barbara Brackman's
Block of the Month, Threads of Memory.

http://civilwarquilts.blogspot.com

This is how I made my block, it may
differ from the original.


Fabric Requirements:

Fabric A: Red print
4 - 4 1/2''squares

Fabric B: Green
1 - 6'' square 

Fabric C: Large Light Print
2 - 6'' squares - Mark a 
diagonal line on back.

Fabric D: Blue
1 - 6'' square

Fabric E: Small Light Print
4 - 1 1/2'' squares
4 - 1 1/2'' x 2 1/2'' rectangles

Fabric F: Red
8 - 1 1/2'' squares - Mark a 
diagonal line on back.

Fabric G: Fussy Cut
1 - 2 1/2'' square

Make Small Center Star: 


Make Flying Geese Units:

Place a Fabric F 1 1/2'' square on left
side of a Fabric E rectangles and sew
a thread width below drawn line.  Open
and press to the corner, trim back 2 
layers of fabric to 1/4''.


Repeat process on the right side of 
rectangle.  Make 4 of this unit.


Layout units as shown and sew
together in 3 rows.  Press seams 
in rows 1 and 3 to the outside and
seams in row 2 to the inside.


Sew rows together and square to 4 1/2''.


Make Quarter Square Triangles
(Outer Center Units)

Pair 6'' squares in the following combinations
with right sides together:
1 - B/C    1 - C/D
Sew 1/4'' away from each side of drawn line,
cut on drawn line and press seams to the
Fabrics B and D.  On the Fabric B/C units,
mark a diagonal line on the opposite
diagonal from the seam.


Pair a B/C unit with a C/D unit with
right sides together as shown.  Be 
sure to have seams lock against each 
other.  Sew 1/4'' away from each side 
of drawn line, cut on drawn line and
press seam open to reduce bulk.


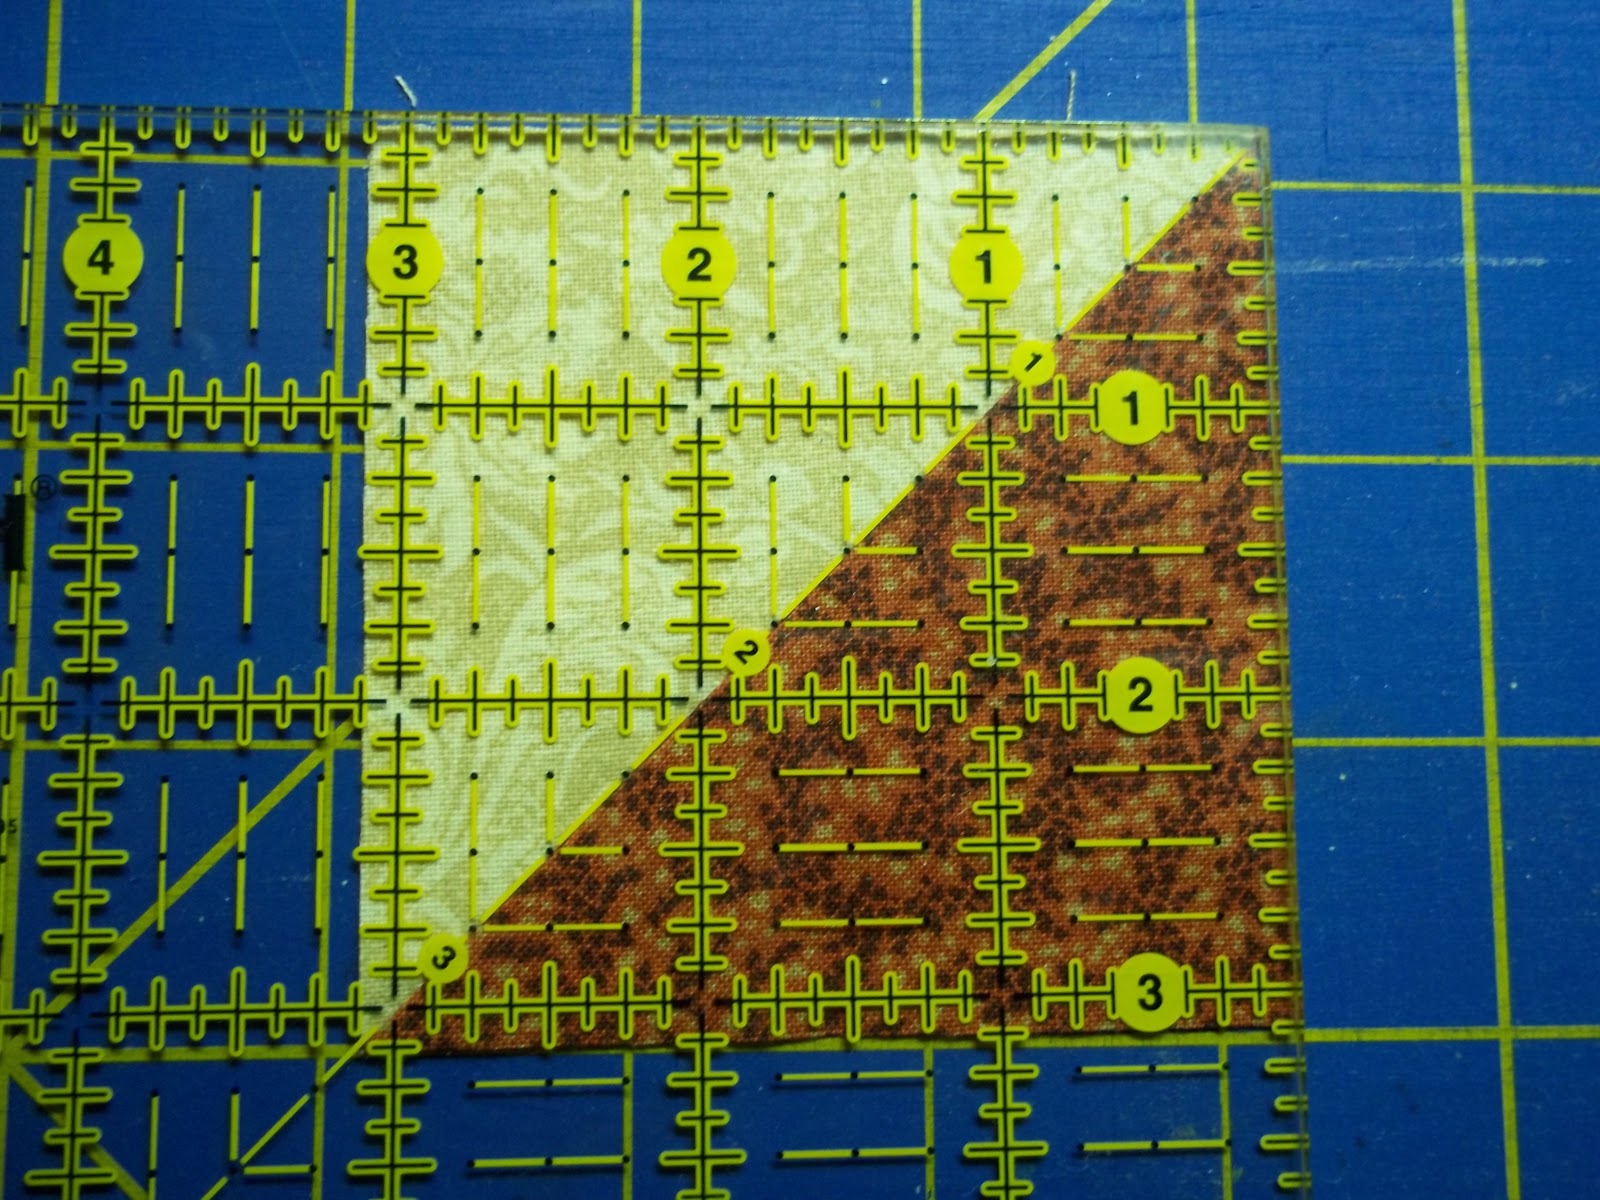
Squaring a Quarter Square Triangle is easy 
if you follow the directions!  Place the diagonal
line of the ruler along the seam line as shown.
Since we want a 4 1/2'' square, place the 2 1/4''
intersection at the center of block (as shown
with the arrow), now trim the top and right 
seams.  


Rotate the unit and place the 4 1/2''
lines of the ruler along the left and bottom
edges and trim the remaining untrimmed
edges.  Make 4 of this unit.


Layout units as shown and sew together
in 3 rows.  Press seams in rows 1 and 3
to the outside and seams in row 2 to the 
inside.


Sew rows together and press final seams
open to reduce bulk.  Square to 12 1/2''.

Check out everyone's work on Dustin's Flickr site:
http://www.flickr.com/groups/threadsofmemory/#

If you like what you see here, please
become a follower of this blog and leave a 
comment, let me know you are out there!
~ Ellen

Wednesday, November 20, 2013

Missouri Star


This makes an 8 1/2'' unfinished block.

Marie has requested pressing tips,
I'll add them in red.


Fabric Requirements:

Fabric A : Light
4 - 2 1/2" Squares
1 - 5 1/4" square -
cut with 2 diagonal cuts

Fabric B: Medium
2 - 3 1/4" Squares
cut with 2 diagonal cuts

Fabric C: Dark
2 - 3 1/4" Squares
cut with 2 diagonal cuts

Fabric D: Medium
2 - 2 7/8" squares
Cut with 1 diagonal cut

Fabric E: Medium
1 - 3 3/8" square


Sew 2 Fabric D squares to
opposite sides of Fabric E
square.  Press seams out and
trim dogears.


Sew remaining 2 Fabric D
triangles to remaining sides
of Fabric E square.

Press seams to the outside.

Square to 4 1/2".


Sew together Fabric B
and Fabric C triangles as
shown.  Notice there are
4 of one type and 4 of
another.  Press seams
to the dark fabric.


Sew Fabric B/C triangle
unit to a Fabric A triangle.
Take care to use the correct
Fabric B/C triangle.  Press seam
to the dark fabric.  Trim dogears.


Sew B/C triangle unit to
other side of Fabric A triangle.
Again, take care to use the
correct B/C triangle.

Press seam to the dark fabric.

Square to 2 1/2" x 4 1/2".


Sew 2 Fabric A squares to
each side of rectangle units.

Press seam to the light fabric.

Make 2.


Sew 2 rectangle units to
each side of center square.
Take care matching points.

Press seams open to reduce bulk.


Sew units together as shown, 
again, take care to match points.

Press the last 2 seams open
to reduce bulk.
Square to 8 1/2".


This is another one.

Wednesday, November 13, 2013

Churn Dash - 8 1/2'' block


A Churn Dash block is quite easy when
made as a 12 1/2'' unfinished block but when
you need it to be an 8 1/2'' unfinished block,
it is much more challenging.  Here is how to
do it.


This is what I cut:

Fabric A: light floral
2 - 3 1/2" squares - cut on diagonal
4 - 3 1/8" x 1 7/8" rectangles

Fabric B: dark pink
2 - 3 1/2" squares - cut on diagonal

Fabric C: dark stripe
4 - 3 1/8" x 1 7/8" rectangles

Fabric D: pink & white floral
1 - 3 1/8" square


Sew light and dark triangles
together on long edge.  Press
seam to the dark fabric.
Square to a "heavy-handed"
3 1/8" or 3 1/8' + a smidge.

Oh yeah, such technical terms,
right?  I mean just a bit over 3 1/8".
In my first block I squared all
9 units to 3 1/8" exactly and with
sewing and pressing it ended up
as 8 3/8" instead of 8 1/2".


Sew light and dark rectangle
units together on long edge.
Square to 3 1/8" plus "a bit."


Layout units as shown and
sew together in 3 rows.


Press seams in rows 1 & 3
to the outside and seams
in row 2 to the inside.


Pin and sew rows together
taking care to have the seams
"lock" together at the
intersections as you pin
to achieve precise piecing.


I pressed the final 2 seams
open as this reduced the bulk
in the block and made it flatter.


Mine squared up at 8 1/2"
using this method.


Here is my first attempt.

Wednesday, November 6, 2013

Birds in the Air


Hi!  If you enjoy this blog, please become
a follower, I need to know if anyone is out
there using these tutorials!  And pop on over
to the American Homestead blog and see what
is going on in my life.  All the best!  ~ Ellen


 Cut 2 dark & 3 light 3 1/2"
squares, then cut on the diagonal.
Then cut 1 - 8 7/8" square &
cut on the diagonal.


Sew 3 light and dark squares as
shown, mine squared up to 3 1/8".


Sew units together as shown.


I found that pressing seams
as shown above is the best
option to achieve precise points.
Especially that center seam, notice
those seams are pressed in opposite
directions, they will lock together
when you pin the seam.  After
sewing this seam, I pressed the
seam open to reduce bulk.


Sew the final light triangle to
the light & dark unit.  Next you
have to trim the long edge of this
triangle, take care to leave 1/4"
from the points of the dark triangles.

 
Then sew the above units together
along the long edge of the triangles.


Press seam to the solid triangle
and square to 8 1/2".


Here is another one I made
using different fabrics for the
dark triangles.


This is another with
different fabrics.

Wednesday, October 16, 2013

Cotton Boll

Cotton Boll

 
Hi!  If you enjoy this blog, please become
a follower, I need to know if anyone is out
there using these tutorials!  And pop on over
to the American Homestead blog and see what
is going on in my life.  All the best!  ~ Ellen


This is a block that you have to think of
as a 4-patch, then it is easy.


Cut 4 - 2 7/8" squares and cut on diagonal.


Cut 4 rectangles 3 3/8" x 7".
Use the same fabric for all 4 or
2 of one and 2 of another, the
choice is yours.
On the back, draw a line in the center.


Place the diagonal line on a square
ruler on top of the drawn line and
the point of the angle on the edge
of the fabric.  Cut excess triangles off.


Place long edge of small triangles
right sides together on long edge of
rectangles.  Overlap the point of the
triangle by 1/4" and sew.  Repeat to
the other side.


This is an important step for
precise points.  Press the triangle
seams of 2 rectangles to the inside
and the seams of the other 2 rectangles
to the outside.  If using rectangles of
the same color, just do 2 and 2.  If  using
2 different fabrics, press Fabric A
seams to the inside and Fabric B
 seams to the outside.


Square up the pointed edge
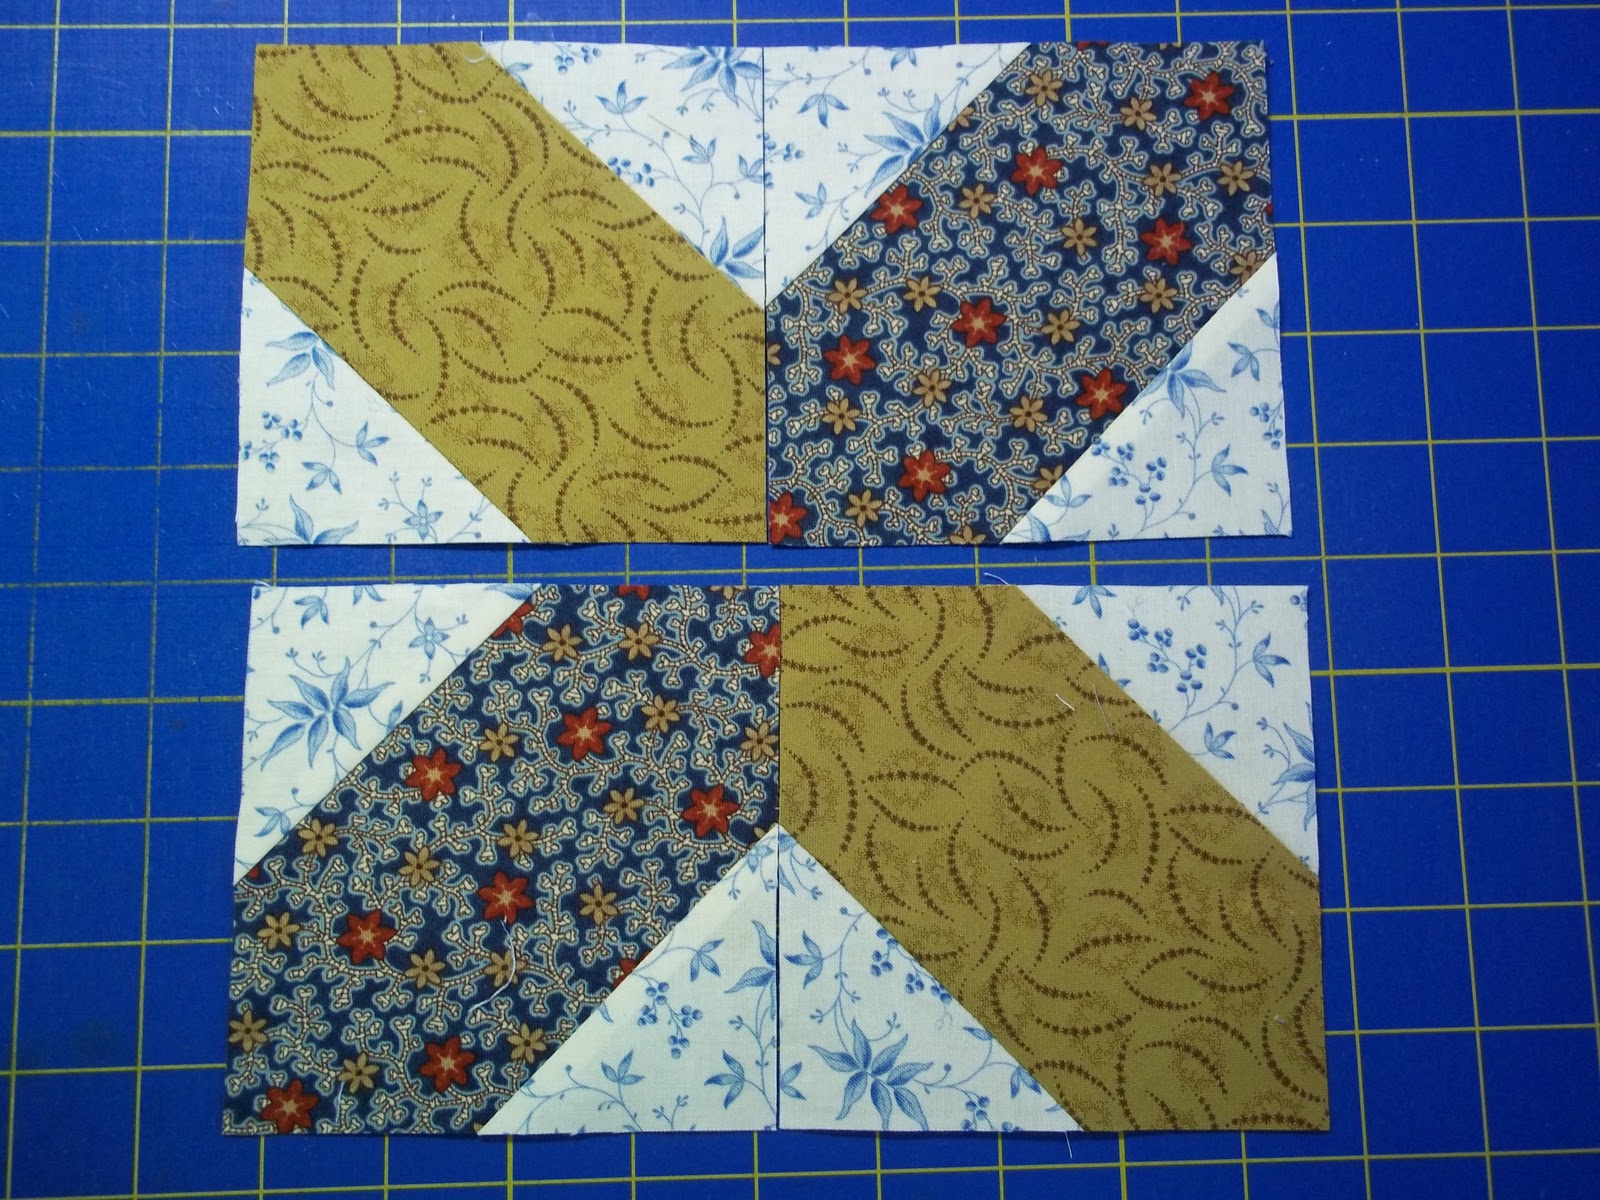
of rectangle as shown.


Now square up opposite side
of rectangle, unit should measure
to a 4 1/2" square.


Layout units as shown and sew
together in 2 rows.  Now this is
where the pressing of the seams
comes into play.  As you pin the seam
before sewing, take care to "lock" the
seams together at the mid section
of the seam.


By pressing and taking care you
will get very precise points.


On the two units press the
seams in opposite directions.


Sew final seam of block and
press seam open to reduce bulk.


Square block to 8 1/2".


Here is one I did using the
same fabric for the rectangles.