Wednesday, November 30, 2011

Empty Spools

 
Hi!  If you enjoy this blog, please become
a follower, I need to know if anyone is out
there using these tutorials!  And pop on over
to the American Homestead blog and see what
is going on in my life.  All the best!  ~ Ellen
 

This is a fun block!
 

Fabric Requirements:

Fabric A: Dark (Red)
2 - 2 1/2" x 8 1/2" rectangles
1 - 4 1/2" square

Fabric B: Light (White print)
4 - 2 1/2" squares - Mark
a diagonal line on the back.
2 - 2 1/2" x  4 1/2" rectangles


Layout 4 1/2" square and 2 1/2" x 4 1/2"
rectangles as shown and sew together.


Place 2 1/2" squares right sides together
with 2 1/2" x 8 1/2" rectangles as shown.
Sew on drawn line and press to the corners.


Trim back 2 layers of fabric to 1/4".


Layout units as shown and sew together,
  press seams open to reduce bulk. 


Square to 8 1/2".
 

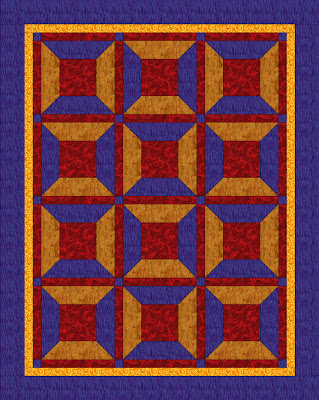
And a full spool.


It would make a pretty quilt.


I like it even better with sashing.

Wednesday, November 23, 2011

New England Block

 
Hi!  If you enjoy this blog, please become
a follower, I need to know if anyone is out
there using these tutorials!  And pop on over
to the American Homestead blog and see what
is going on in my life.  All the best!  ~ Ellen
 

The New England block looks more
complicated than it actually is.  It looks
interesting when placed side by side.


Fabric Requirements:

Fabric A - Light (white & green print)
4 - 2 1/4" squares
4 - 3" squares - Mark a
diagonal line on back.

Fabric B - Medium (orange)
4 - 2 1/4" squares
1 - 1 1/2" square

Fabric C - Dark (green)
4 - 3" squares

Fabric D - Medium (rust & white print)
1 - 2 1/4" x 8" rectangle

Fabric E - Dark (purple)
1 - 2 1/4" x 8" rectangle


Make Half Square Triangles:

Pair Fabric A/C squares right
sides together.  Sew 1/4" away
from each side of drawn line. 
Cut on drawn line, press seams to
the dark fabric.  Square to 2 1/4".


Sew Fabric D & E rectangles
together along long edge.


Cut a small piece off one short edge
to make sure it is even, then cut 4
1 1/2" units.


Make Corner Units:
Layout units as shown and sew
together in 2 rows. Press seams in row 1
to the left and seams in row 2 to the right.
Sew rows together.
Make 4.


Layout units as shown and sew
together in 3 rows.  Press seams in
rows 1&3 to the inside and seams in
row 2 to the outside.


Sew rows together and press
the seams open to reduce bulk.
Square to 8 1/2".


Here is another one I made.


I kept thinking this block would look
good with a log cabin block.  Perhaps
call it "New England Cabin?"
I think I would adjust the block size
so the red center squares were the
same size.  I think that was why I
kept thinking of a log cabin block.

Wednesday, November 16, 2011

White House


Hi!  If you enjoy this blog, please become
a follower, I need to know if anyone is out
there using these tutorials!  And pop on over
to the American Homestead blog and see what
is going on in my life.  All the best!  ~ Ellen


Cutting Requirements:

Fabric A - Light:
4 - 2 1/2" squares
Mark a diagonal line on back.

Fabric B - Stripe:
4 - 2 1/2" x 4 1/2" rectangles

Fabric C - Medium
4 - 2 1/2" squares

Fabric D - Dark
4 - 2 1/2" squares


Place Fabric A squares
right sides together on
Fabric B rectangles as
shown.  Take care to
place drawn line as shown.


Sew a thread width below the
drawn line to accomodate the
turn of the fabric.  Press to the
corner, trim back 2 layers to 1/4".


Sew Fabric C and Fabric D
squares together.  Press to
the dark fabric.


Layout units as shown.


Sew together and press
seam open to reduce bulk.


Square to 4 1/2".
Make 4 of these units.


Layout in 2 rows.


Sew together.  Press row 1 to
the striped fabric, press row 2
to the striped fabric.


Sew rows together.


Press seam open to reduce bulk.


Square to 8 1/2".


Here is another one I made.
Am I Stripe Deficient?
Am I Anti-Stripe?
I must admit I was hard pressed
to find striped fabric in my stash.
I had to rummage through the scrap
bins.  I guess I'll have to go shop
for fabric.  Poor me...

Wednesday, November 2, 2011

Underground Railroad

 
Hi!  If you enjoy this blog, please become
a follower, I need to know if anyone is out
there using these tutorials!  And pop on over
to the American Homestead blog and see what
is going on in my life.  All the best!  ~ Ellen
 

This is a block that can create
many different quilts by how you
place the blocks together in a quilt.
 

Fabric Requirements:

Fabric A: Dark (Red)
1 - 5 1/4" square - Mark
a diagonal line on back

Fabric B: Medium (Green)
1 - 5 1/4" square
4 - 2 1/2" squares

Fabric C: Light (White print)
4 - 2 1/2" squares


Make Half Square Triangles:
Place 5 1/4" squares right sides
together and sew 1/4" away
from both sides of the
drawn line.


Cut on drawn line
and press to the dark.


Square to 4 1/2".


Make the 4 Patch:
Layout squares as shown
and sew together in 2 rows.
Press row one to the left
and row 2 to the right.
Then sew rows together.
Press seam open to reduce bulk.


Square to 4 1/2".


Assemble Block:
Layout units as shown and
sew together in 2 rows.
Press row 1 to the left  and
row 2 to the right.

\

Sew rows together and
press seam open to reduce bulk.


Square to 8 1/2".


Here is another one.


By placing fabrics in
different places in the block
 we can make one like this.


By alternating fabric
placements in the blocks
we can make one like this.


By rotating the blocks we
can make one like this